Build a Video Recording & Playback App in React Native Expo (Android & IOS)
How to build a video recording application for both Android and IOS devices using JavaScript code.
Hello, native developers!
When you start learning React Native, then you go through different lectures, tutorials, and articles to build different projects and learn stuff. A recording app is one such application. For a recording app, you must know how the camera app functions, how you can manage video quality, bitrate, duration, and much more. How do you stop the video recording or video playback? There is much more to know. So, let’s start with a cup of coffee.
If you prefer a video tutorial then it’s here:
Setup and Installation
Attention all developers seeking to make social connections and establish themselves while earning passive income — look no further! I highly recommend ‘From Code to Connections’, a book that will guide you through the process. Don’t miss out, grab your copy now on Amazon worldwide or Amazon India! You can also go for Gumroad
Start an expo-CLI project in your preferred directory using the command: expo init videoRec (you can name it as per your choice). Choose the blank template and complete the installation of JavaScript dependencies. After that, install the following package in the parent directory using the commands:
npm install expo-cameranpm install expo-av
expo-camera is used to operate camera functionality in the React Native app and expo-av is used to display video in your application. With the help of the expo-av package, you can play, stop, forward your video in your application.
We are done with the installation part. Let’s begin the hack now.
💡Also learn more about the power of server-driven UI in React Native:
👉 To read more such articles, sign up for free on Differ.
Code of Video Recording Application (React Native)
App.js
Import the following components from the respective package as we are going to use them in our project.
import React, { useState, useEffect } from 'react';
import { StyleSheet ,Text, View, Button,} from 'react-native';
import { Camera } from 'expo-camera';
import { Video } from 'expo-av';
First, we are going to set our camera for video recording. Then we will switch to display that video. Now, for video recording, you need to access two things from the users. One is, of course, the camera, and the other is microphone access for audio purposes.
const [hasAudioPermission, setHasAudioPermission] = useState(null);
const [hasCameraPermission, setHasCameraPermission] =useState(null);
const [camera, setCamera] = useState(null);
const [record, setRecord] = useState(null);
const [type, setType] = useState(Camera.Constants.Type.back);
We are going to use react-hook for audio, video, camera permission, type, and record. As we ask permission from the users to access and then change our state from null and set it to other fields.
useEffect(() => {
    (async () => {
      const cameraStatus = await Camera.requestPermissionsAsync();
      setHasCameraPermission(cameraStatus.status === 'granted');const audioStatus = await Camera.requestMicrophonePermissionsAsync();
      setHasAudioPermission(audioStatus.status === 'granted');})();
  }, []);
The above code is used to access the permission of the camera and microphone of the user’s device. Once the user gives the permission, then the null state of the camera and microphone are replaced with the updated states.
const takeVideo = async () => {
    if(camera){
        const data = await camera.recordAsync()
        setRecord(data.uri);
        console.log(data.uri);
    }
  }
This arrow function will take care of your video recording and we set the URI of the video as data. Just console log this URI as stated above and you will see the video URL link in your internal storage.
const stopVideo = async () => {
    camera.stopRecording();
  }
To stop the video recording, we need the above arrow function.
if (hasCameraPermission === null || hasAudioPermission === null ) {
    return <View />;
  }
if (hasCameraPermission === false || hasAudioPermission === false) {
    return <Text>No access to camera</Text>;
  }
If the user denies the access permission, then we are going to show “No access to the camera” on-screen.
<View style={styles.cameraContainer}>
     <Camera
      ref={ref => setCamera(ref)}
      style={styles.fixedRatio}
      type={type}
      ratio={'4:3'} />
 </View>
The above code is used to show the camera. We want a camera screen in the ratio of 4:3. You can customize them accordingly.
<Button
   title="Flip Video"
   onPress={() => {
   setType(
     type === Camera.Constants.Type.back
     ? Camera.Constants.Type.front
     : Camera.Constants.Type.back
     );
     }}>
</Button>
<Button title="Take video" onPress={() => takeVideo()} />
<Button title="Stop Video" onPress={() => stopVideo()} />
These are the basic buttons we are going to use. The first one is to flip the camera, which means you can record the video either from the front or back camera. The other two are for recording the video and stopping the video.
Now we can shoot the video. How we are going to play it?
Play the Video using React Native
To play the video we need two new react hooks.
const video = React.useRef(null);
const [status, setStatus] = React.useState({});
Now add the video playback screen and play button.
<Video
   ref={video}
   style={styles.video}
   source={{
     uri: record,
   }}
   useNativeControls
   resizeMode="contain"
   isLooping
   onPlaybackStatusUpdate={status => setStatus(() => status)}
/>
<View style={styles.buttons}>
  <Button
    title={status.isPlaying ? 'Pause' : 'Play'}
    onPress={() =>
       status.isPlaying ? video.current.pauseAsync() : video.current.playAsync()
    }
   />
</View>
For playing the video, you need the URI of that video. We already made the URI of the recorded video and saved it in a record state. We simply have to use it here.
Now, you can customize your video too. How to do that?
Customize video quality, duration, bit rate using React Native Expo
const takeVideo = async () => {
    if(camera){
        const data = await camera.recordAsync({
          VideoQuality:['2160p'],
          maxDuration:10,
          maxFileSize:200,
          mute:false,
          videoBitrate:5000000
        })
        setRecord(data.uri);
        console.log(data.uri);
    }
  }
Remember this: we are using the camera to record video. Now add the variable as per your choices. Here we set the video quality to 2160p, the maximum duration is calculated in seconds. The file size is calculated in bytes. The mute field is boolean. We have set the video bitrate as 5mbps. Set this as per your choice and requirements.
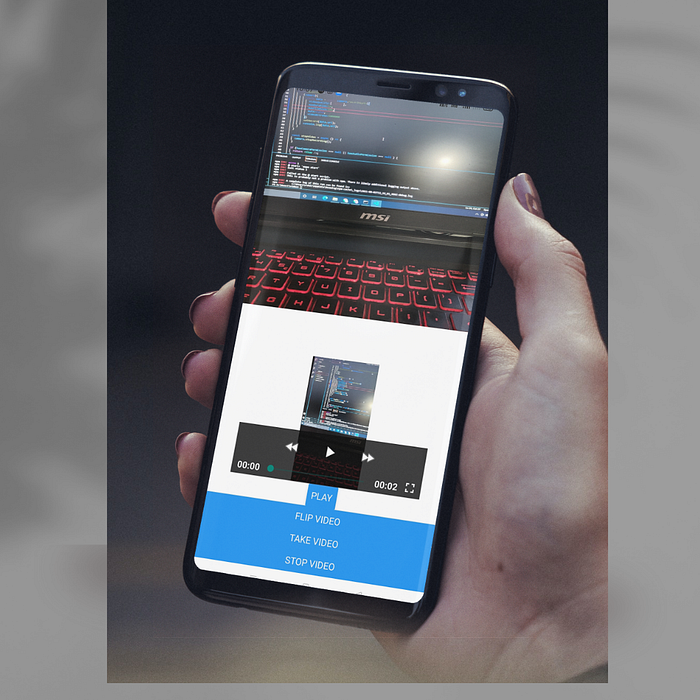
As we mainly focus on how these things function instead of styling. You can style them accordingly. Now run this application in the terminal window and run this on your device with the expo app. You will see output something like this on your device screen.
That’s all for this article. If you are lost somewhere or need full code access, then the Github code is here.
Thanks for reading! And if this article is helpful for you, then feel free to clap as much as you want.
In Plain English 🚀
Thank you for being a part of the In Plain English community! Before you go:
- Be sure to clap and follow the writer ️👏️️
- Follow us: X | LinkedIn | YouTube | Discord | Newsletter
- Visit our other platforms: CoFeed | Differ
- More content at PlainEnglish.io