Serverless with Local DynamoDB
Introduction
Hope you guys are doing great. This article is about building your own serverless application by installing the DynamoDB locally and configuring it. If you are not familiar with what is serverless is or what is DynamoDB is then I would recommend you to first get the basic idea of this system. For this article, I’m assuming you already have a basic idea of how serverless is working with DynamoDB. So let’s understand the need for offline setup. Bdw, you can find the source code here
Why it is needed?
As everyone knows, serverless costs more than the regular server setup(If you have done everything right). So it is essentials to make the cost at a minimum, by doing the local setup and with the right migrations, you can set up a cool working environment for you and your team using ngrok or similar. Now let’s get started with the coding.
Get Started
To get started with the serverless, you need to install the serverless package locally. You can do it by using npm i serverless -g or yarn global add serverless. Once you have installed the application, you can create an app by using the command but for this tutorial, I’m using everything from scratch.
Now, we are done with the theories, and let’s jump onto some code. To begin with we need to create a file name serverless.yml which will be our entry point here. Following is the content from the file.

In this file, you will be seeing code that will make you confuse but don’t worry we will go to each piece by piece.
You can add or remove from the file based on your need like removing middleware or adding a .env to it
- service — It is the name of your serverless app
- frameworkVersion — Framework version, you can specify that from the serverless guide
- provider — Your serverless provider. Mine is AWS. You can also add additional fields to it at the application level
- functions — This is where you will spend most of your time writing the logic for your business. A function will have multiple states like a handler, memorySize, events to trigger
- plugins — Additional library which you need to run the app like middleware, local DB, serverless-offline
- custom — A custom object for your plugins
- resources — Your migrations for the database if any
- package — Build time packaging to include or exclude the modules
Now you have a basic idea of the approach, we can move ahead with the local DynamoDB
First, we need to install few packages
- bluebird — To handle promise
- serverless-middleware — To add middleware to your handlers
- UUID — To generate a new id for your documents
- serverless-dynamodb-local — [Dev]To manage DynamoDB local
- serverless-offline[Dev]
Installation
To begin installation you need to have Java ready for your machine. Once you have downloaded the Java. You can download DynamoDB local manually or run npm i db-setup to get the copy.
If you are not using the npm package then you need to download the copy first and then run the following command in the same folder
java -Djava.library.path*./DynamoDBLocal_lib -jar DynamoDBLocal.jar -sharedDb
Now, let’s create a database folder in the root project and create a dynamodb.js file under it. Below is the content for the connection
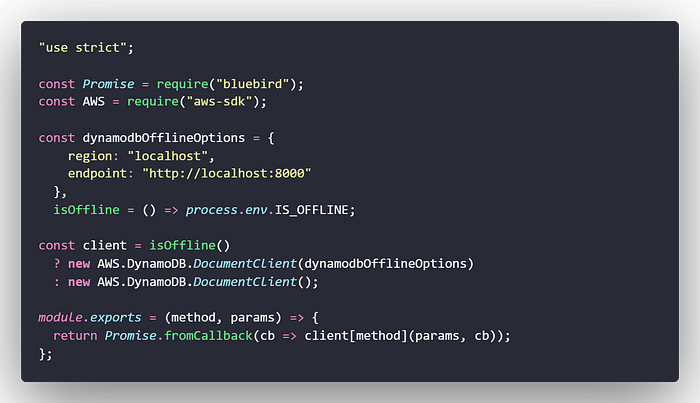
process.env.IS_OFFLINE is a value given from the serverless-offline package. We have configured the database from that. We need to just give a local address for the copy.
Now the database has been connected. We need to create handlers and middleware for them. But before that, we need to add some operations and utils for the approach. You can copy these files from the repo here. These are just for a better coding approach and nothing more.
Now let’s create a folder name offline/migrations to create and store the migrations and seeders for the project. Create a file named user.yml which will create the table for us

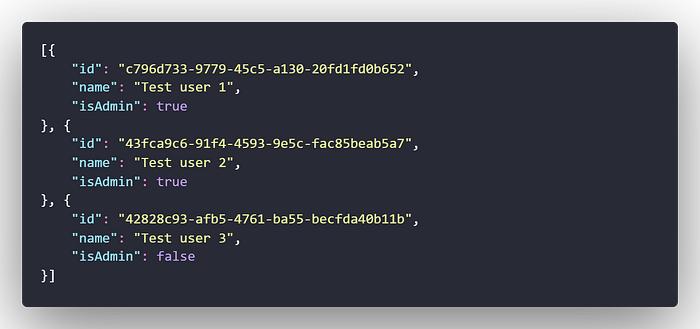
This will give the id to the table. You can configure that based on your need and add seeders you can see any raw data with the only id as mandatory fields. If you go back to the serverless.yml we have a custom object configured to take the source of data
Now let’s create a config.yml file to store the configuration variables based on the stage. You can handle that with the help of .env file as well

This will also resemble the serverless.yml file to get the env variables.
Now let’s create a file operations/user.js to handle the DB operations
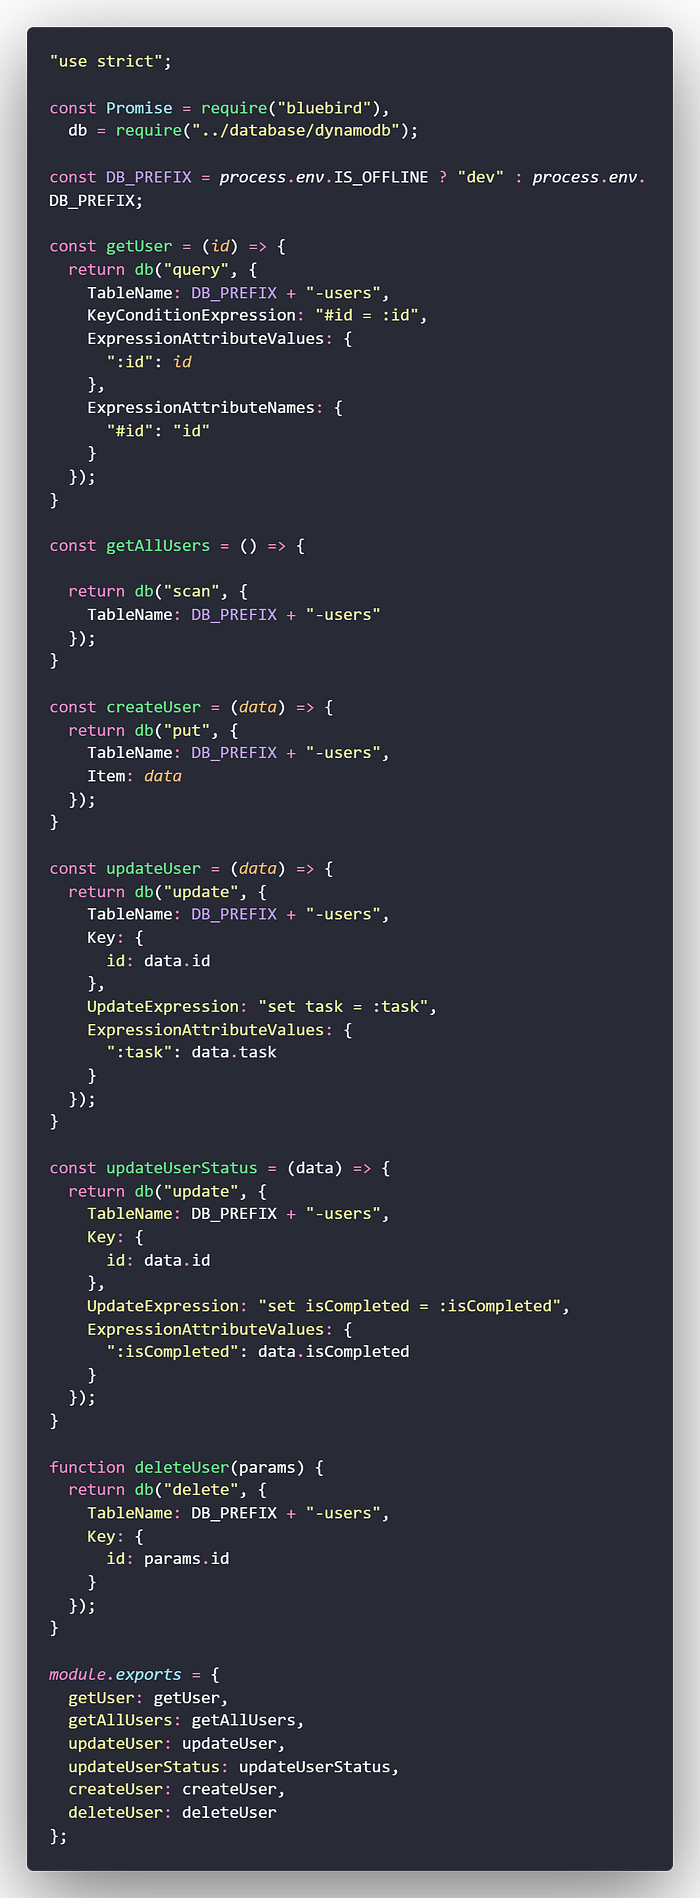
Here you could just create small queries to the database which to do the CRUD operations for us.
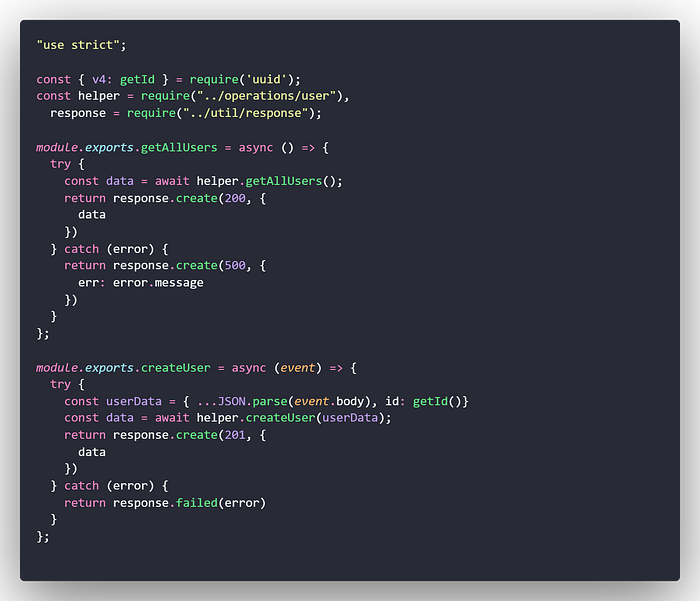
Now let’s create a folder name api in the root project and add a file user.js If you don’t want middleware you can clean up the serverless.yml
Now in user.js, following are the content
Run the application
To run the application you can simply type the command npm run dev to start the server and also run the migrations you just created if you are offline
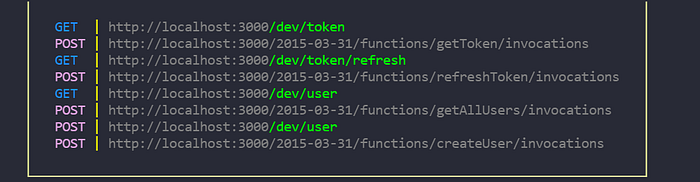
You would see something like that if everything went right. You can try and play with the code as you required.
Hope this article helps you to configure the serverless with the local DynamoDB. Thanks.
More content at plainenglish.io