Getting Started with Expo React-Native
Creating your first mobile application with Expo React Native

Hello Folks, I have completed the whole Firebase Authentication series of articles where I am have covered authentication using almost all the methods provided by firebase.
You can read more here => http://i-hate-reading-logs.vercel.app/Today we are shiting to altogether a new series i.e. React-Native. I will be using the Expo(https://docs.expo.io/) to cover up the react-native articles.
Overview
- Getting started with expo by creating an account
- Installation of the required packages globally
- Designing the architecture of the repository and writing code
- Running and Debugging the application on a physical device.
Getting Started
For installing expo you can either refer to this link (https://docs.expo.io/get-started/installation/) else I am also explaining the process below.
First, it’s always good to create an account on the expo.io website. Although you don’t need to, I would recommend creating one. Followed by installing the “expo-cli” npm package globally in your system. expo-cli npm helps to run the expo command in the whole system which in return assist you to use all assistance provided by Expo out of the box. Run the following command to install the package globally.
yarn global add expo-cliNOTE => Whether you are using mac or windows after running the above command reopen your Terminal or Powershell after closing them, otherwise your system will give a “Command Not Found” error.
Testing command globally
After reopening the terminal(for mac users) & Powershell (windows users) run the following command to check the installation status.
expo whoamiIf everything works as expected after installing the package and creating an account in expo.io you can see your email from whom you have logged in.

Creating Project
Expo provides the commands to create the boilerplate for your react-native mobile application. Run the following command to create an expo project.
expo init {name_of _the_project}After running this command you will prompt with some basic templates options to choose as shown below.

Choose the required one template and click “Enter”. For the sample project, I will go ahead with the “minimal” template. This will create the boilerplate with project name as {name_of_the_project}. Your boilerplate template will have architecture like the image below.
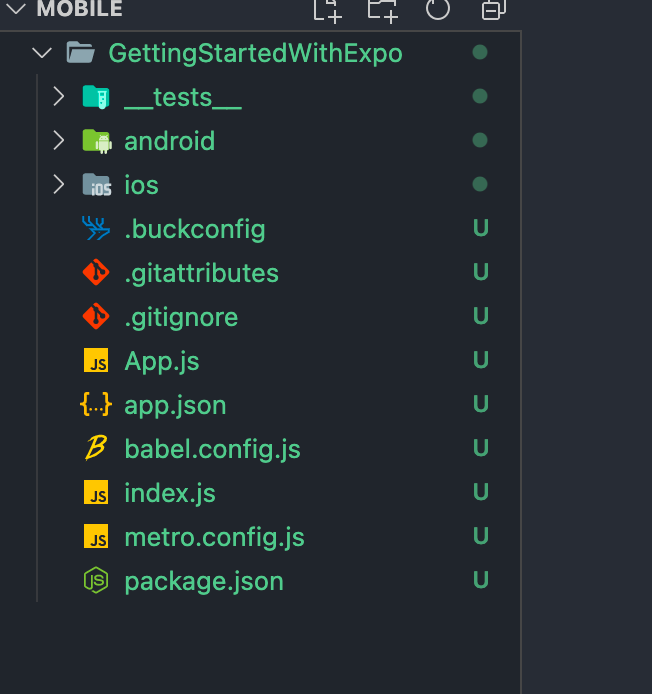
Pretty simple, isn't it. Expo has actually accomplished all the necessary steps for you so that you can directly start with writing code.
Testing & Debugging
To run the code and test it on a physical device make sure of the following requirements —
- Expo mobile app installed on your phone. (https://apps.apple.com/us/app/expo-go/id982107779)
- Your phone and laptop should be connected to the same internet.
Once the above requirements are fulfilled you can move inside the expo folder and run the following command.
expo startUnder the Hood
This command will create the js bundle of your whole application and upload it on the expo server, then after scanning the expo server QR code through your phone you can download that JS bundle in your expo mobile app to run it on your phone. Expo creates metro bundler on localhost portal to show the building process status. In addition, you can share the application link from Metro Bundler using email and by scanning the QR code as shown in the bottom left corner of the image below.

After scanning the QR code Expo will build the JS bundle of react-native application as shown in the image below.

Debugging
In case everything doesn’t work accordingly, here might be a few hints to debug the issues-
- Check your phone internet and system internet they should connect to the same IP
- Check the Node package version it should be greater than 8
- For mac users, you do need Watchman and Git installed
- For Windows users, you do need Powershell & Yarn installed
If everything works as expected you will see your application running on a physical device as shown in the image below.

Conclusion
I have tried to have this article short and simple, trying to make you understand the installation process and getting started with Expo, so I didn’t cover any further steps in the context of the architecture and making changes in the code repository. I will cover those points in further articles.
Until next time, Have a good day, People.
Code Repository => https://github.com/shreyvijayvargiya/iHateReadingLogs/tree/main/TechLogs/MobileMore content at plainenglish.io

